
|
|
|
|
|||||||
| Boating Talk For discussion of everything related to boats and motors |
 |
|
|
Thread Tools | Display Modes |
|
#21
 12-04-2015, 12:01 AM
|
||||
|
||||
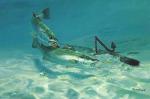
  Then last night we spent until about 9pm cutting the front border off. We couldn't cut it before because the boat would loose form, but after we got the back cabin wall tied into the hull and sides, that will hold the front nose in place. We also left an inch of glass on there to keep it a little more rigid. After we cut this, me and Harold tried to take it out, and it was too heavy for the two of us. We had to wait until this morning and it took 4 guys to get it over the front of the boat. Completely water logged.  Here's where the border slept last night as two people weren't even almost getting that thing over the side:  And then I got to show off my mad geometry skills that I learned on the Hull Truth website. A while back i saw this cool circle drawn on the side of one of the boats that an old timer was building and after a little bit of thinking figured out what he was doing!   That's how you figure out the crown. And that's what we did today! We didn't get done, but we got the first and second jig forms done for the cabin roof, and got almost done with the 3rd until we broke off the last sawzall blade and had to stop for the night.    We still have to cut down the first foam wall which will be our starting point. That will have 6 iches of crown, and then then next form is 22 inches closer to the nose and will have 5 inches and each form is 22 inches from the next and has one inch less crown and is one inch max height lower. Hopefully this will look cool when I'm done, we'll see. When we get the jigs built, we already have the foam ready to go in the warehouse with one side glassed and both sides cured. I'm not sure yet if I will have to cut each piece the width of the centers of the jig, or if I can use one foam piece for two jigs, we'll see how well it bends, but maybe tomorrow I'll have something stuck on the front ??? 
|
|
#22
12-04-2015, 04:05 PM
|
||||
|
||||
|
Still working, but I got these cool shots and thought I stick them up. Cabin forms are done, we'll have that thing sealed up in no time!
 
|
|
#23
12-05-2015, 01:33 PM
|
||||
|
||||
|
looking great
I know its not going to tell the whole story, but it would be real interesting to put all that stuff on a scale and add up just how much weight you took off of it just in that pile of stuff that has been cut off of it so far.
|
|
#24
12-05-2015, 01:40 PM
|
||||
|
||||
|
Yeah, scales would be cool in general
On a different note, I couldn't believe how heavy the front border on this thing was. I mean like maybe 300-400 pounds for just the border ???. In contrast, when we get done with the new front border, it'll be weigh more like this one: 
|
|
#25
12-06-2015, 04:47 PM
|
||||
|
||||
|
Well, we got alot done, but didn't get many pictures, will take some more tomorrow. We got the floor in the cabin, glassed in and ready, and then we built two shelves in the cabin on each side. The one on the port side will have the air cleaner for the motor under it so we can keep the cabin air clean.
And then we got the top cut! This is not glued on, but I set it in place with a couple of screws so I could see what the cabin will look like. There is still a visor that we are going to build, so this isn't done yet, but I am really pleased with my arc!   
|
|
#26
12-07-2015, 07:06 AM
|
||||
|
||||
|
I'm interested in the math you used, care to explain a little?
|
|
#27
12-07-2015, 10:56 AM
|
||||
|
||||
|
Quote:
 Then I set up a compass, one of those things the draw circles, or in Spanish it's called Compas, and I set the distance of the circle radius to the height of the crown. Then I put the sharp part of the compass right in the corner of the lines above, and make a circle. The distance from the corner to the place the circle intersects the lines should be the same height of the crown I want. So i have something like this:  I usually don't draw the full circle, but sense I'm using paint it's hard to do just the top part of the circle. Then I measure from the top part where the circle hits the line to the right part where the circle hits the line. I divide that number by 6, and then I know how far to mark each line ??? Here's a picture:  Pretend that is a circle. Paint sucks. Then I draw lines from the center of the right angle through the points that I marked and all the way out to the circle:  Now using a straight edge, I measure the intersections for the lines that I made with the circle, from the base line. But I don't measure them starting at the center of the right angle, I measure them straight up from the base line. If you come out with the all same numbers, you are measuring from the original intersection of the lines. The way you measure it is in RED. The heights of the red lines are the numbers you are looking for:  So if the crown I want is 5 inches, I will have 7 numbers. The first one is 5 which is the center, and then I will have 5 more measurements which are the red lines and then the last number is 0 which is the edge. So then I measure the width of the boat. I divide that by 12, and then make a chart. The top number is 0, shortest red line, next red line etc...5, longest red line, next longest red line...0. The bottom line starts with 0 and then you add 1/12 of the width for each number on top. Here is one of the charts, I think this makes sense? Its all the numbers:  I convert everything to centimeters because then I don't have to deal with fractions. So 7.7 is my overall height, and that's like 3 inches I think ??? So that bottom chart is my 3 inch chart. And then you draw a line using string across the top of the boat, and mark the 0 line on the plywood which is the outside height, and then you measure across 1/12th of the width of the boat, and start with the shortest red line and mark that height. Then after you have twelve heights (0, 5 red line heights, total crown, 5 red line heights in descending order, and 0) at 12 different equal intervals (by dividing width of boat by 12) you mark it and connect the dots Any Questions ?
|
|
#28
12-07-2015, 12:44 PM
|
||||
|
||||
|
Quote:
Basically you laid out an element. Good stuff, I do understand it.
|
|
#29
12-07-2015, 12:52 PM
|
||||
|
||||
|
Quote:
just sort of add up how much each thing weighed as you took it out the best you can guess about it, that should be a good ball park range to be close to being accurate. since this is a diet project I would like to be able to keep track of how much weight is really coming off of it
|
|
#30
12-08-2015, 01:44 PM
|
||||
|
||||
|
Still no great pictures, but here is the under deck plumbing. You can see I built an air intake again, this time it'll use a short hose and connect right to the turbo, and then the other side of the hose is in the cabin to keep the cabin smelling fresh and maybe get an extra MPG
  
|
|
#31
12-09-2015, 09:45 PM
|
||||
|
||||
|
A little progress today. Today my second guy, not Harold but the other guy, had to do a quick job for big bucks, so it was my and Harold again
 And then we got the front part of the floor in. That isn't glassed on top, but it is glassed on bottom and we have it connected to the boat with cabosil and resin. Tomorrow we will glass that in and then Harold will cut the benches. I am waiting on my small fuel tank that is coming, and that is why we didn't close up the center. The big 4 inch wide stringers make it easy to stick stuff to, much different than the half inch bulkheads of my 28 footer. I went around and around about where to put the tank. I hate when boats have two tanks, because you have to switch tanks and then when ther is a fuel problem it's a nightmare. Than I thought about putting the tank behind the motor, but my 28 footer is front light, and I think this one will be too. The tank is a 50 gallon plastic tank, so it's not too heavy. The cabin up front probably weighs 100 pounds finished, so there is no other weight up front. We'll see.   And here is one of the out takes. All those pretty circles in the picture were little pieces of glass that the camera flash lit up. My poor lungs... 
|
|
#32
12-09-2015, 09:50 PM
|
||||
|
||||
|
Oh, and I didn't explain this tube. i thought it would be fun to pipe the motor box air to the back of the boat with a blower. That way as long as you aren't down wind of the tail pipe, there will be no diesel smell if there is a small fuel leak or exhaust leak.

|
|
#33
12-10-2015, 07:18 AM
|
||||
|
||||
|
Yall work fast!
|
|
#34
12-12-2015, 02:11 PM
|
||||
|
||||
|
Got everything glassed up. Started with the front cap. We got one layer on a day ago to hold it in place, but we couldn't glass where all the supports were, so now we have that done
 And we got it done. Two layers on top and two layers on bottom.   And then we glassed in the two pieces of floor. These were just stuck down with cabosil before.  Now we are working on more floor and the benches up front. More pictures coming soon,
|
|
#35
12-12-2015, 06:53 PM
|
||||
|
||||
|
Ok, the other pictures were from yesterday, here's today's progress. We got two more sections of floor down.
 And then we started building the seats! This was the first attempt, but I don't like the square look.  So we decided to round off the corners. I love simple, but sometimes things look bad when they are too simple   That's as far as I got on the seats today, but we'll go after that hard Monday and maybe get one or both installed. The port side will have an ice chest, so we are going around the inside with 2 inch divinycell H60 a friend gave me. It's double scored, so it'll make the bends easier than the solid corecell I'm using for everything else. And then I took some shots from the nose of the boat. It's really starting to take form and look like a boat again, a couple of more weeks and we'll have most of the foam work done and then start the never ending process of FAIRING!!!  
|
|
#36
12-14-2015, 09:01 PM
|
||||
|
||||
|
It's getting better, I'm not sure I'm sold on it yet, but it's getting better than the square one...
 I know it's not level yet. This is an in process shot.
|
|
#37
12-15-2015, 08:08 PM
|
||||
|
||||
|
Ok, made some progress today, here's quite a few pictures of what we done.
We got the frame done for the port side bench. I've decided that since the battery goes under this one, and since I hate hatches, we are going to have the whole bench just sit over there with a frame on the inside, and then two small bumpers on the outside to hold it in place. That way I can get to the battery easily, and this is also where all the cables are going to go up top, so I like having the access.  And then we got the starboard side glassed in as well. What you can't see, is the back half of this bench has 2.5 inches of foam all the way around it and on the bottom and it has a 2 inch division in the center. We are going to put a door in the top of this one and it's going to be an ice chest. I wish I had taken some pictures of the before we put the top on, but i didn't!  We got some more supplies in today. Here is a bag of joy, as you can see on his face! This is the microspheres that we are going to mix with gelcoat to fair the boat. That is a bag of torture right there!  And then I almost did the whole redo in DivinyCell, but I went with CoreCell at the last minute as it's more expensive and that makes it better  And then we finally got rid of the last plywood weight on the boat.  Holy c***, the border was HEAVY. I couldn't take that piece out of the boat by myself, and with me and Bernal (the guy in the pic) it was still heavy. That will go back in super light. And then we took off the rest of the borders as well  The original outside shell of the hull isn't too thick. I think we'll have a good strong lightweight boat when we are done. Not at all as thick as I thought it would be. But remember we already took out the inside mold.  And then where the border was connected to the hull, the fiberglass was waterlogged and I pulled it off by hand.  It smelled terrible and there was this nasty brown liquid that smelled a little bit like fart and catalyst that leaked out as we pulled the seperated glass panels apart. You can see a little bit of the brown here:  And back to the positive, I really like how the transom crown and the cabin crown compliment each other.  And I think the boat is prettier without those heavy borders.  Tomorrow me and Mako will start on the new border and Harold and the homeless guys will start on the torture (sanding and fairing)!
|
|
#38
12-16-2015, 11:19 AM
|
||||
|
||||
|
I love the way you and your crew are giving new life to this boat. Any Reports on how the other boat you just redone has been doing fishing?
|
|
#39
12-17-2015, 07:18 PM
|
||||
|
||||
|
Ok, we got alot done in the last two days. Yesterday we decided to start building the gunnel frame. One of my friends that you see in some of our night photos, came by and brought me out to see some gunnels he built out of foam on a different boat. His used a LOT less braces than we used on the 28. I jumped up and down on his border, and satisfied, we decided to go with less braces on this one as well. So this is a mid process shot on building the braces:
 And we did both sides. We started by copying the hull onto the foam and then cutting it out the same width to make the inside rail of the gunnel, and then cut some foam piece for the connecting pieces and then glassed it all together. With that done quickly, we roughly cut some foam and stuck it to the top with cabosil and resin and right now it's screwed down, but the screws will come out. We put a 2 by 2 in the corner to screw everything together with and that will come out. The cuts on the top are all a little bit big, but since there is no glass, it'll be easy to fair up with a 3 foot board and 36 grit. We're going to do all the screw holes and any other filler before we glass it, so it'll be pretty solid. We have the whole thing glassed on the bottom already. This is what we have got so far:   And with that drying, the guys wanted to cut the transom piece. I thought we should wait, but I was in the minority and I let the guys have their way. They are wanting to do the top part and use the tape measure and boards to hold it in place until it dries. I'm still waiting on the steering piston so we can't do the back floor yet, but once the floor is in, they finish out the live well. I'm sure they'll figure it out.  And then the tank also came in. This is where it goes:  We still have to build another sub floor for the tank so it gets 100 percent support on the bottom, so this is just a rough in. I have 3 inches of drop towards the pickup, and the vent is on the high side, so I think it should work out great. Tomorrow we are going to sand the borders and fair them up and then glass the borders on top, hopefully. Then Saturday we should paint the boat and I plan on fishing it Sunday
|
|
| Bookmarks |
| Thread Tools | |
| Display Modes | |
|
|


 Linear Mode

